These artist’s notes are copyright to Graham Baker and may not be shared or copied without permission. Any enquiries, please email to grahambaker@gmail.com.
Prepare the Substrate
The idea behind sealing or undercoating your canvas or board is to cover the substrate evenly to prevent the artist’s paint from soaking into the background and drying unevenly. Most artists use pre primed canvas’ (acrylic gesso); they do not require sealing again.
Both acrylic and oil based undercoats dry flat and adhere well to the surface. They are ideal for either Acrylic or Oil paintings as long as they are applied evenly. If you are preparing a very porous material, like MDF, it will require a minimum of two coats. I use the same undercoats that commercial painters use on buildings. Generally this paint can be thinned by about 10% without breaking down its integrity. Thin your paint, it is usually too thick and gooey straight from the pot.Gesso is excellent for undercoating; it provides you with a smooth, slightly more absorbent surface to work on.
Pour off into a separate container about the right amount of paint you need and thin that down, just in case you put in too much water or turps and over-thin your entire supply.
Laying off: This technique will ensure the paint film will go on evenly, no areas will be missed and the finish is perfect. The correct brush size and the laying off method are essential for blending and other applications.
If you have ever struggled to get paint on smoothly and quickly it is most likely because you have not wet the brush prior to dipping it into your paint. Dip your brush into water and squeeze the surplus out. Any brush every time, it will become more flexible, hold its shape and will make it easy to distribute the paint evenly and efficiently
Painting Your Substrate
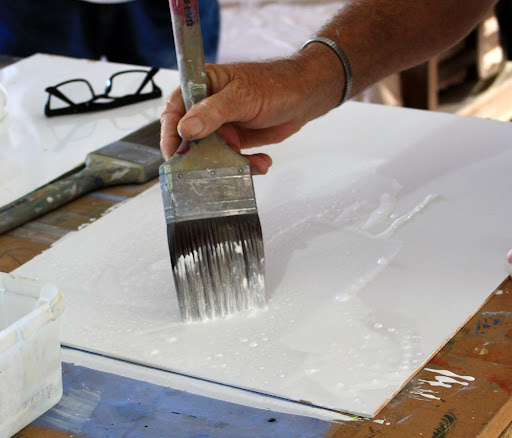
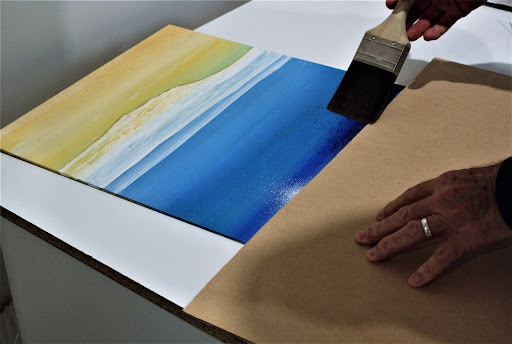
Load your brush with plenty of paint and drop it onto the board. The idea is to cover the entire surface quickly while the paint is very wet. Wipe the surplus paint off your brush.
Then without adding more paint, pull your paint with vertical brushstrokes evenly down the board. Start at the top and make sure you go right over the lower edge. Do the same with the horizontal strokes. Again make sure your brush strokes go right off the far end of the panel. It is important to have the paint thin and lay off in just the two directions then stop.
Leave the wet paint to settle evenly and dry. Laying off our paint in two directions is how we apply paint whatever the area or brush size.
The board will require two coats to ensure it is sealed correctly, so subsequent layers do not soak through and appear flat and dull. The brush you see in the image is a 75mm Decor brand from Bunnings. Synthetic brushes are fine as long as they are very soft. Don’t bother using bristle brushes. They are too coarse for this job.
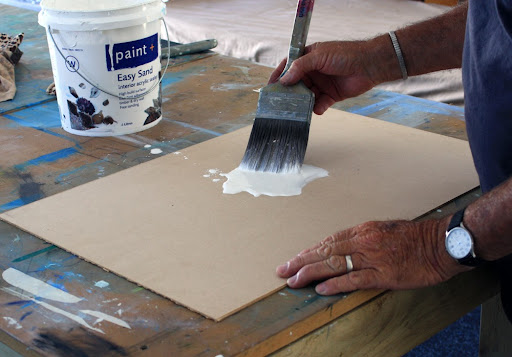
Brush fully laden with paint, I have dropped near the centre of the panel. It is important to dump plenty onto such dry surfaces so there are less trips back and forth to the pot to collect more paint. It makes the whole process more efficient.
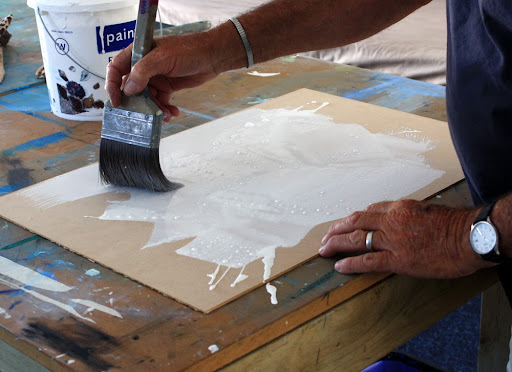
Quickly cover the entire surface. Throw it on. 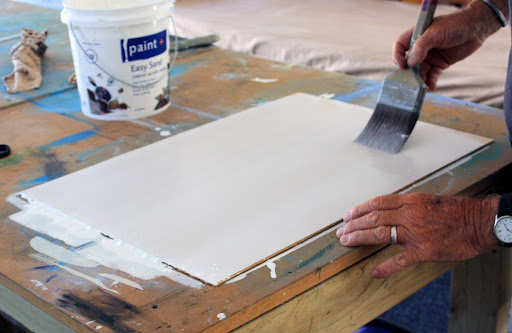
Gently laying off horizontally, soft hands. 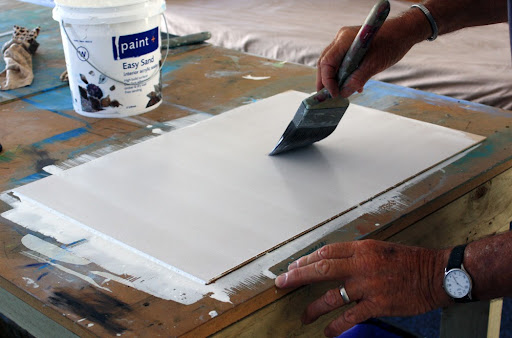
Gently laying off vertically, soft hands. 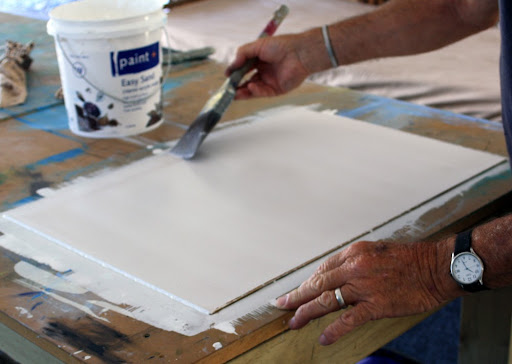
Lightly removing surplus off the edges.
Note: You can hear the click as your brush travels past the edge and lands on the table underneath.
The paint will settle down flat and even. If the colour does not look solid when dry, give it another coat. Lay off all paint this way, large areas or small. Once you have painted a few backgrounds this way it comes easy. If you find that too difficult, use a roller. Thin the paint a little and lay off in both directions just the same as the brush. Trust the method, do not play around with the paint. Leave the board to dry.
Note: acrylic paint will not stick to oil paint. Gloss on gloss doesn’t work, they won’t stick. Even oil paints prefer a slightly flattened surface.
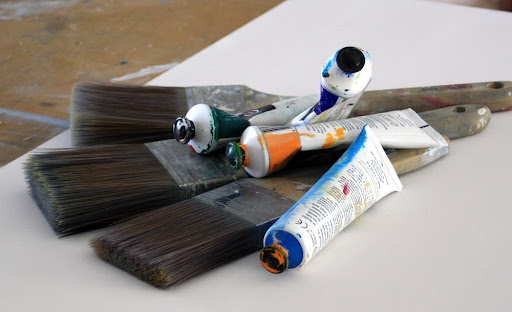
Maintaining Your Brushes
New Artists oil brushes. Trick of the trade.
To keep a brand new brush in perfect condition for years, mix 50% linseed oil and 50% turps and soak the brush in it for a couple of minutes. Then turn it upside down for a couple of hours. The turps will carry the oil up into the furrow and this keeps the fibres pliable and in good condition. Wash your new oil brush out gently with clean turps. Squeeze the surplus out then dip the hair into Neatsfoot oil.
Shape the brush between your fingers gently and lay it flat in a sealed container. Cockroaches love neatsfoot oil brushes.
Oil brushes are expensive because they are sable or a sable mix. They are expected to last for years.
Good quality water based paint brushes are usually a mix of sable and ox hair for stiffness. They should be washed out in warm soapy water before they are used because they are treated with a poison by the manufacturer to hold its shape and keep them from getting eaten by bugs. Do not put them in your mouth.
The cheaper soft synthetic brushes do not need this sort of treatment. They may wear down quicker but I find they perform just as well.
As soon as you finish with each brush, wash them out with warm soapy water especially if you are using acrylics. If you have several brushes on the go, rinse them under a tap then lay them in a tray of water.
No brush whatever the make or size should be allowed to dry with any trace of paint in them.
Large painters brushes should be rinsed out and left to stand up to the furrow in clean water while you are using it. Wash several times in warm soapy water when you have finished for the day and comb them into shape.
Leave flat to dry.
The smaller, ‘artist’s brushes’ must never be left to stand in the water. They go out of shape quickly and are difficult to reform again. Rinse them clean gently, press them into shape and lay flat. If the brush hairs do become misshapen then run them under hot water facing downwards then press them back into shape.
Look after them because we rely on them to perform to a high standard every time.
Now we have undercoated the substrate, I am about to show you how to paint some acrylic paintings. They will become more complex as I increase the number of elements, level of planning and introduce different techniques.
Composition and Layout
Composition is the theory behind the arrangement of visual elements on a work of art.
- Layout is the physical arrangement of visual elements on a work of art.
- The layout is not only the first step in the creation of a painting but one of the most important.
- The three elements of composition are focal element, structure and balance
I will explain composition material each time it pops up. When it is related to the matter in hand.
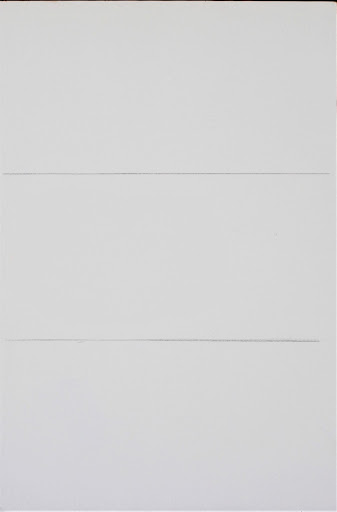
Where I place the horizon will have a huge impact on the balance and the way we see it. Let’s divide the painting into three equal horizontal parts. If I had put the horizon on the lower line the sky would feature and perhaps the waves but not much beach. The painting will be all about the sky. If I choose to put the horizon on the top line the painting will be bottom heavy. The painting will feature the beach and the waves and the sky will have to miss out. This is what I chose to do. The sky becomes the background and the painting will feature the sea, waves and the beach.
Generally keep the weight of your painting low, use the background, even if it means adding a base shape or colour into your composition that does not even exist in the original copy. This ties the elements together, preventing the subject from floating away and serves as the underpainting for contrast with what’s to come.
Paintings are considered to be more pleasing when they are balanced.
Blending
Blending is the technique of gently intermingling two or more colours to create a gradual transition or softening of their edges by drawing a clean wet brush back and forth through one colour carrying some of it onwards picking up the second colour. This creates a soft, gradual change due to the mixture of the two.
Preparation for blending and other effects with Acrylic paint.
Things happen so quickly when we are blending. I lay the tubes of colour, I might need, beside the palette before I start the blend. Tops off. Dip the brush in clean water and gently squeeze the surplus out. This helps keep the shape of the brush, allows the paint to get up into the hair or bristle and helps the paint run out smoothly.
I deposit enough white to cover half of the palette, thinned down so I can add the colours as I need them. This is to give us paint film thickness and that helps the blending process. If we were to try to blend with colours straight from the tube without the wet white base they will not come together evenly.
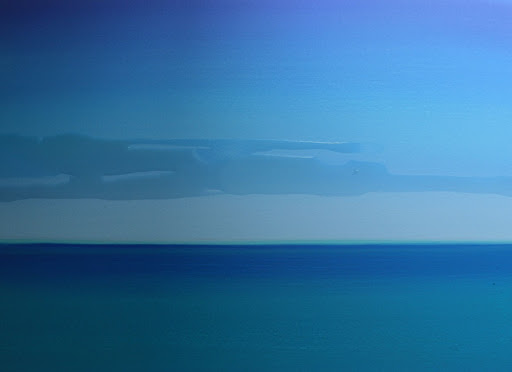
Blending: The Sky
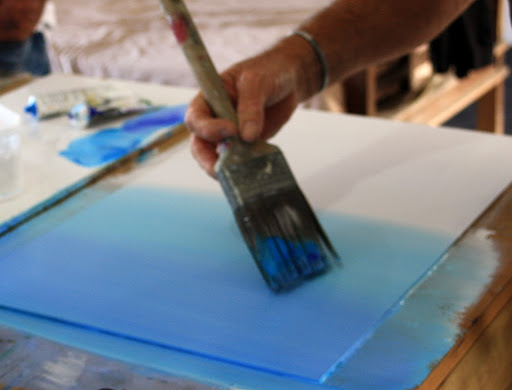
Using the same size brush we used to paint the prep coat I dump enough wet white paint to cover the top half of the painting and spread it evenly and quickly. I start at the top of the painting and work my way down to avoid accidents over the wet completed areas.
While the white is still wet, pick up a little blue off your palette onto your brush intermingling the blue with the white as you work the brush horizontally back and forth and down the board.
As we come down blue loses its strength and the colour softens to a light blue just as I cross over the horizon.
It is important to make those brush strokes confidently, horizontally from one side of the board to the other. Go off the ends with your strokes to ensure you have covered the whole width. No dabbling in the middle.
Often the blend doesn’t come out the way we want. Add more paint and go over it again while it is all wet or let it dry completely. Then try again. In most cases the blend is done a couple of times to build up and improve the finish and film thickness.
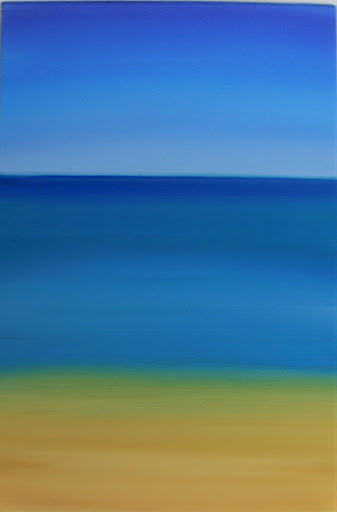
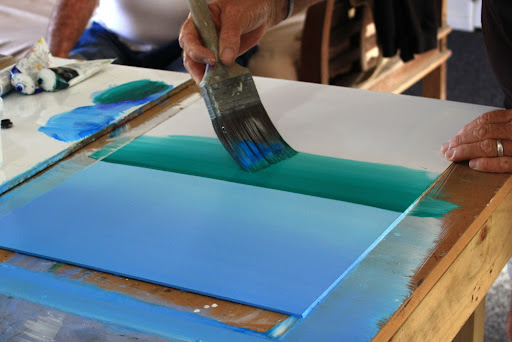
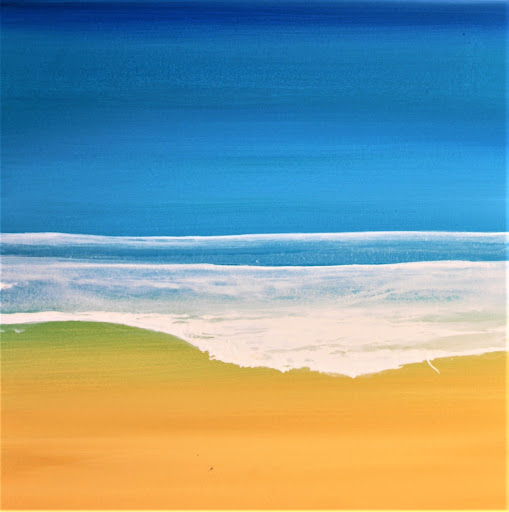
The sea is blended the same way as the sky, using different colours, fading out to white before reaching the bottom. While that white is still wet we apply the sand colour over it and work our way back up into the sea. All blends get softer as they overlap one another. Where the sand merges with the sea it gives the illusion of transparency, being able to see through the water and the sand underneath.

The result is a simple background to a beach scene. 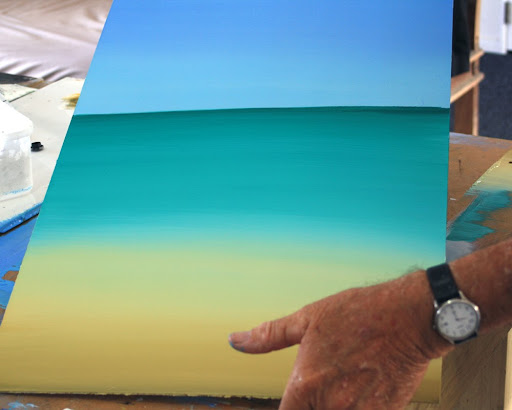
This took a few minutes and so it should.
It was created with a minimum amount of planning and layout (one line, the horizon).
I regard it as the background only, for me to add some features would make it more interesting.
Elements: Clouds
For clouds drop loosely shaped puddles of water where you imagine a cloud should be. Drop thin white paint into the puddles, guiding it around a little but largely leaving the pigment to wander wherever it likes within the puddle shape. Don’t play with it too much. If the cloud is not to your liking use the same technique over the existing one.
My puddle of water is in the shape of a cloud. 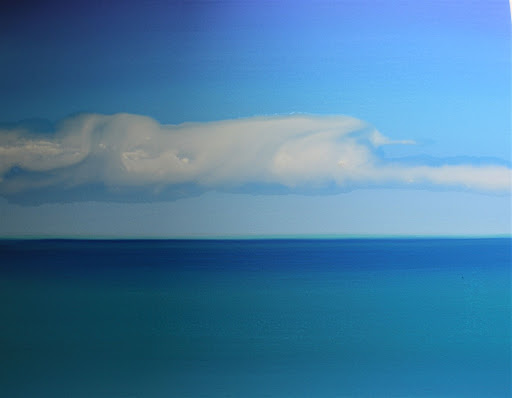
In seconds a cloud emerges, a neat trick.
Leave your board flat, the water and paint will dry and settle into natural shapes. The results are abstract, free flowing natural elements. Free of any interference by the artist. This effect, seemingly random clouds on a seemingly controlled, blended sky is very realistic.
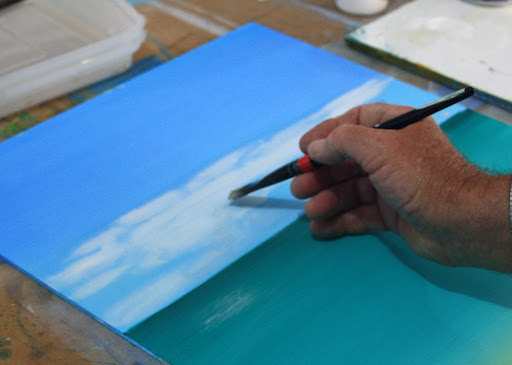
Dropping white paint into the puddle. 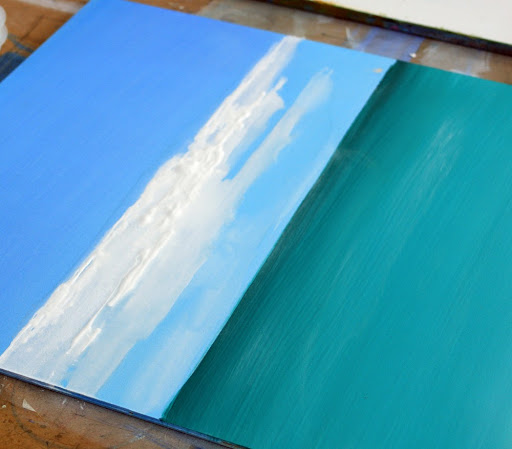
You may decide to take a bit of control by strengthening the leading edges of your clouds with white, blending the paint back into the main body of the cloud for shape.and contrast against the blue sky. The soft underbelly of the cloud is almost translucent giving the illusion of depth of field.
Remember to dip your brush in water before you start painting anything. Gently squeeze the surplus water out. Do not spin the water out, keep the shape of the hair as it should be. The water remaining in the brush helps the paint come off the brush easier and more manageable.
Elements: Wavelets, Headland, Sunlight on the Water, Shadows on the Water and Sand.
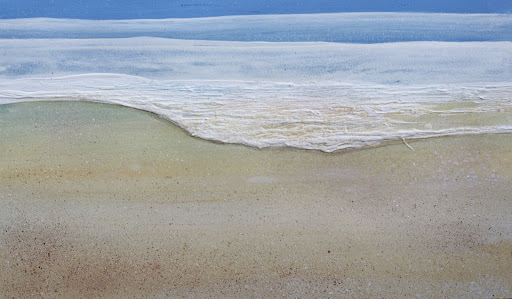
First I place two white lines in the blue near the sand. The top line is the crest of the rear wave just forming. The lower line is the crest of the collapsing wave. I put translucent white wash between the two waves to give the back wave a soft curve.
A couple of things happen at once. The forward movement of the water stalls and spreads sideways, into a lace pattern of foam and the leading edge, laden with foam. It then stops and turns back, folding into itself.
To create this illusion I have placed a puddle of water over the entire collapsed area blending white paint from weak to strong as it reaches the leading edge of the wave (the same technique as the clouds). Where the paint is at its thinnest it will appear we can see the sand through the shallow water. This becomes more apparent when we add the leading edge and paint in the pattern of foam.
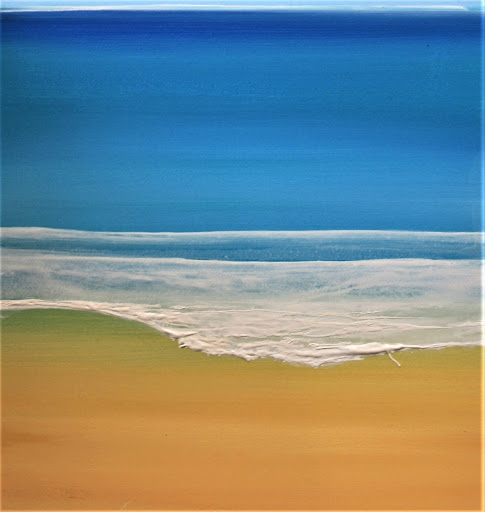
I build up the thickness of the white along the leading edge to create the illusion of thick foam, by dumping thick white paint on with a piece of plastic.
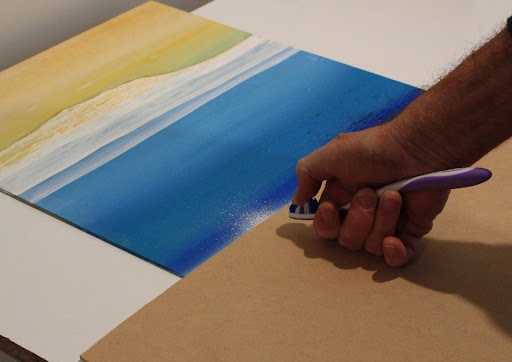
Elements: Sun Reflecting on the Water
This effect follows the horizon into the sea. Mask off the sky. Use the toothbrush effect. Keep your hand in one place so the illusion is the sun directly above that one spot. Keep your hand and toothbrush over the masked off area just in case a great blob lands where it shouldn’t. Move your hand only slightly to fan out the effect.
You need the paint wet and your hand well back over the masking card to get a fine spray. Keep that finger going until you are sure you have enough sunlight sparkling away.
Elements: Wind on the Water
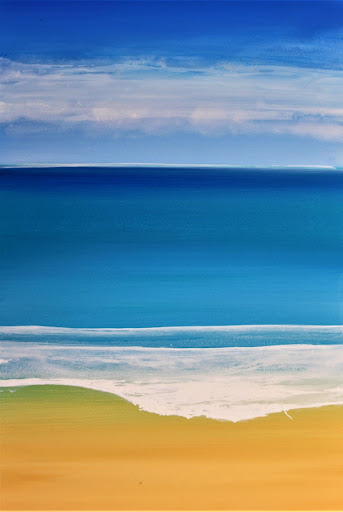
Toothbrush again. The idea here is to quickly create the effect of wind as it ruffles the sea well out from the beach. Sailors watch for this darkness to tell them where the wind is. For this effect we need to create millions of tiny horizontal lines pointed at each end and randomly huddled together. This time using a darker blue colour quite wet so the droplets sit on top of the surface of the sea. Mask off the sky again.
Speckle an area of the sea. Then pull a large dry soft brush horizontally over the wet speckles once to the left and back again to the right. Stop. That’s it.
The brush passing over lightly drags the wet droplets to the left and to the right coming back.This creates the millions of fine lines in the water giving the illusion the wind is hitting it in that area. You may repeat the effect as much as you like but as with all effects, in time you will know when to stop. As you can see below this effect can be used to portray the shadow of the land upon the water also.
Elements: Sand and Texture
Thin your paint on the palette and take it off using the toothbrush. When the water droplets land, the paint separates from the background colour, creating a speckled finish. Let this effect dry or just about dry and use the toothbrush again to add to the beach speckles. Set a few colours aside on your palette, quite wet, dip your toothbrush in and splatter colours over the sand.
The white gives the sand a sparkle.
Experiment on another board with colour combinations you prefer and try the technique. Then when you are confident, do the beach on your painting. If you over thin your paint and the speckle turns to mush, brush it out and start again. Once again it is a natural effect so you have limited control. If you did it wouldn’t look natural at all.
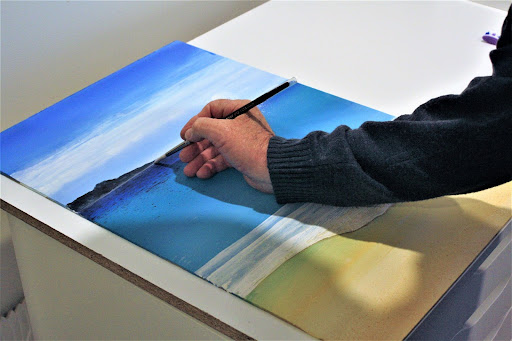
Finally, I brushed a bit of a headland to give the illusion of depth and perspective.
Paint the headland along the horizon.The smaller the shape the further back it will appear. So start small, if you are just making up the composition as you go along. The bottom line should be straight so use masking tape. The shape against the sky can suggest trees and rocks by being ragged or dropping wet colours onto the headland.
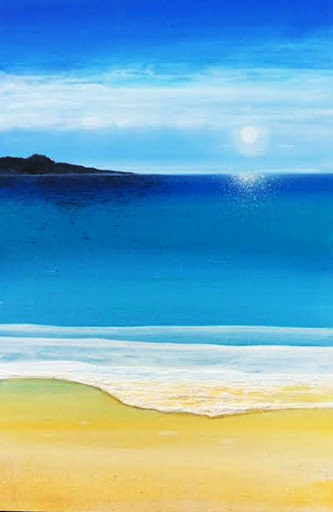
What we put into our paintings has an effect on ‘how’ the viewer sees it. In this painting the main elements were the sky, the sea and the beach. For interest we put some clouds, wavelets and a bit of texture on the sand. The sun reflecting off the water and the shadows, blends in the sea and sky were all effects.
The headland gave the painting some depth of field and somewhere to imagine where the scene might be. All of that is background to support the point of interest or focal element. This is what composition is all about. Assembling all the bits to tell a story.
This is the focal element of this painting. Mum introduces the baby to surfing.
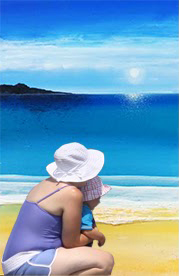
That is our first painting, the simplest. An introduction to a few effects and techniques.
Click Here to Start Session 2
These artist’s notes are copyright to Graham Baker and may not be shared or copied without permission. Any enquiries, please email to grahambaker@gmail.com.