These artist’s notes are copyright to Graham Baker and may not be shared or copied without permission. Any enquiries, please email to grahambaker@gmail.com.
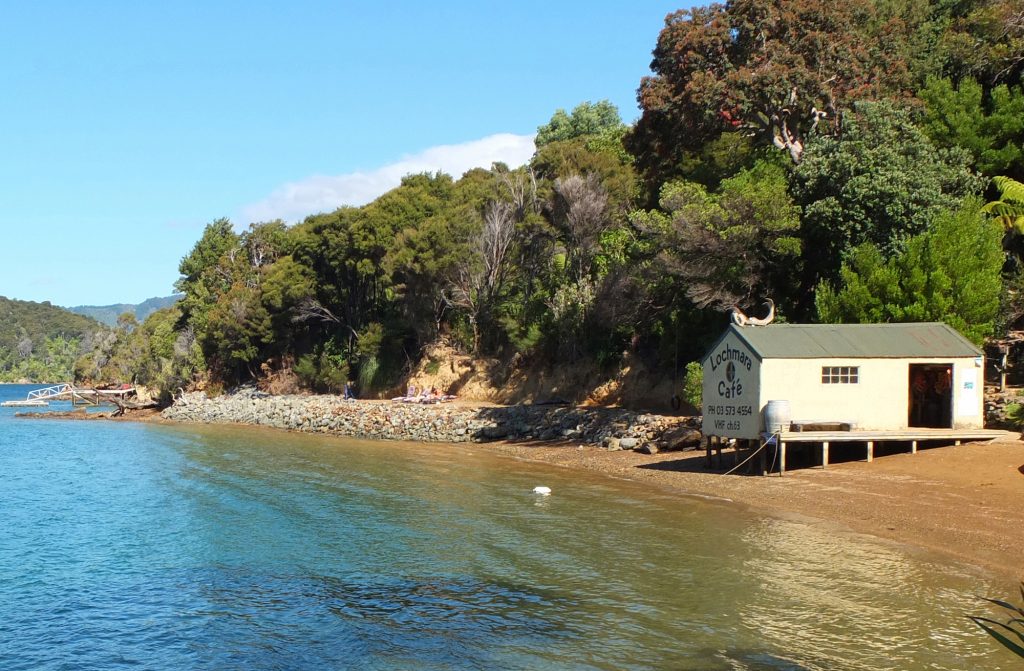
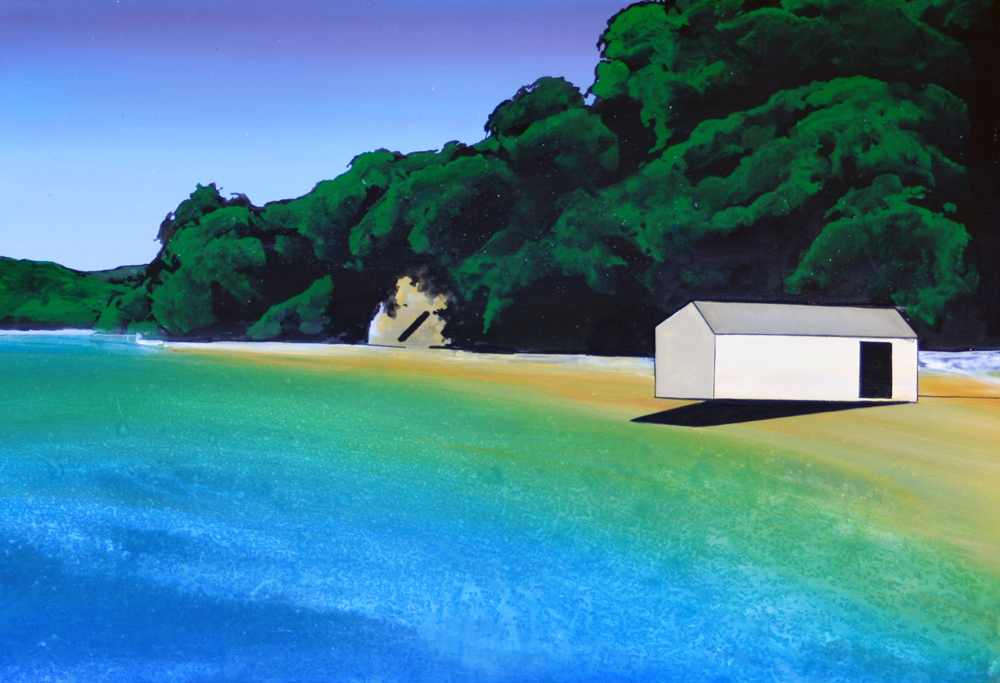
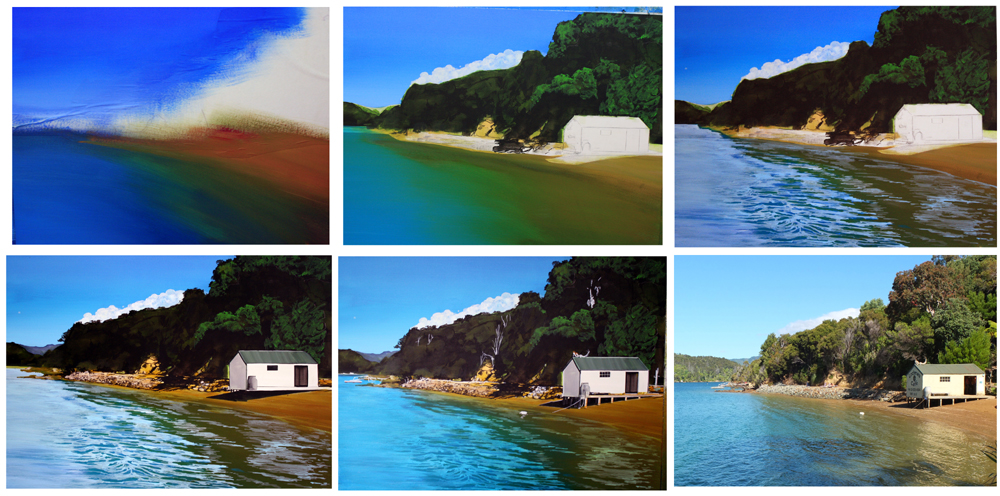
This painting has both natural and man-made elements.
There are many ways to transfer a drawing from your copy onto a canvas. Draw it freehand, use an epidiascope, projector, scale up the drawing using a calculator or use an overhead projector with a transparency. Most of the time I scale the copy up using a grid and draw it directly onto the canvas.
The grid method allows you to produce an accurate line drawing by reducing your copy to a series of small squares, then drawing a grid of an equal ratio onto your canvas. Next transpose the image from your copy onto your canvas, focusing on one square at a time, until the entire image has been transferred.
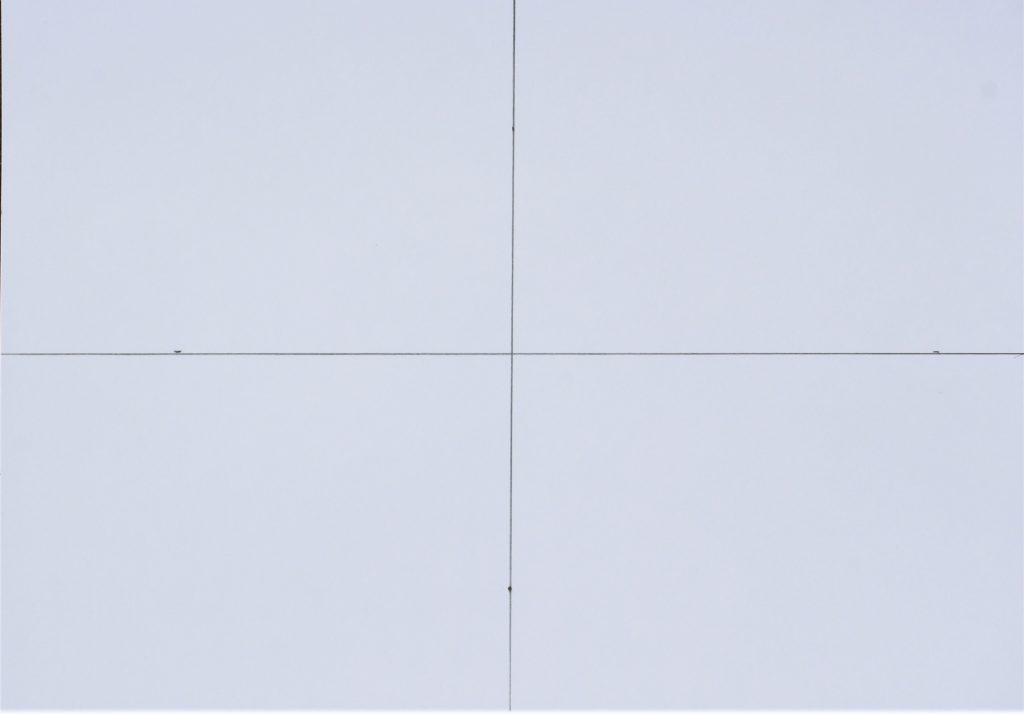
Drawing a grid on the canvas.
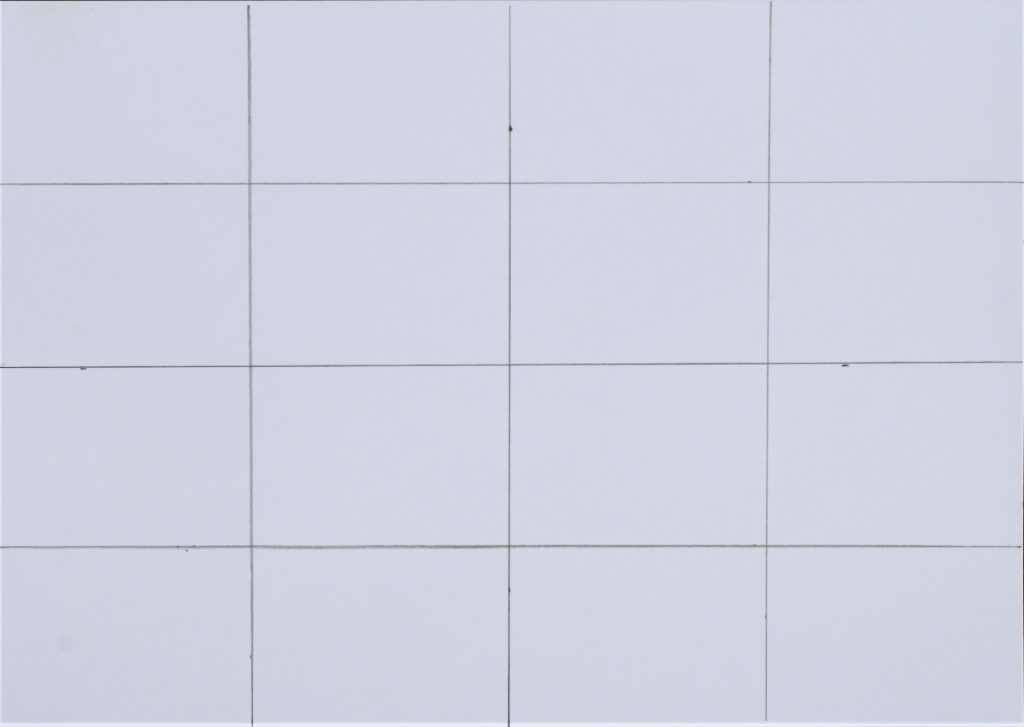
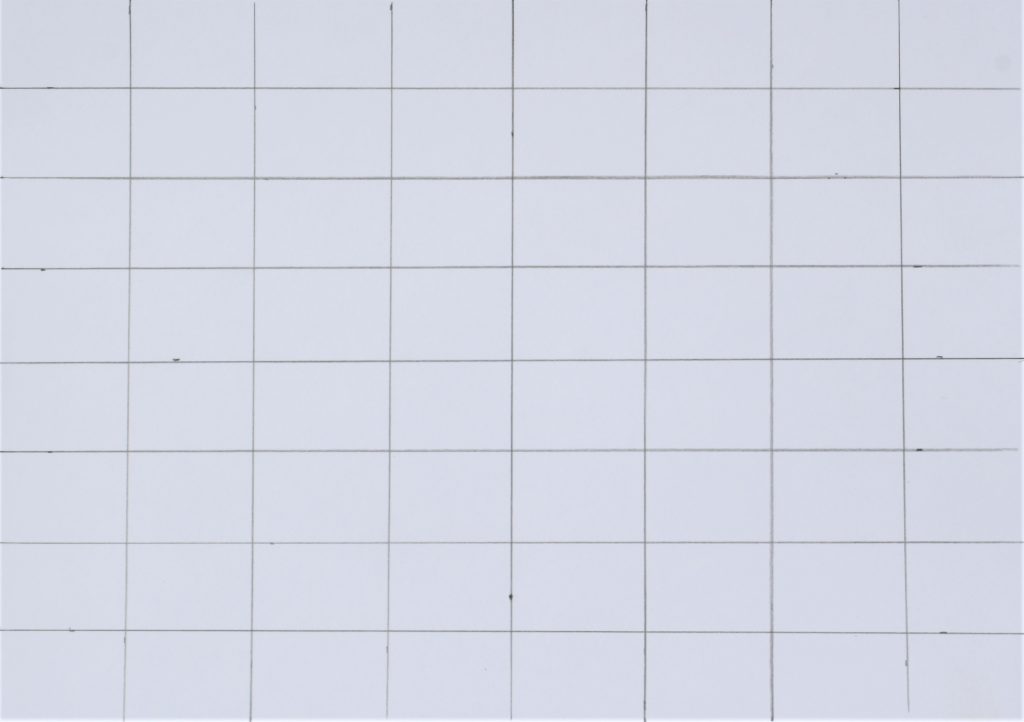
Draw both a vertical and a horizontal line in the exact centre of your canvas. Now our work area is divided into four. Divide each of the four shapes the same way to get 16 rectangles. Then one more time to create 64 rectangles.
The canvas has been divided into four then eight then 16 up to 64 little rectangles. Eight rectangles along the top (width) and side (height). The key thing to remember is the canvas shape has to be in proportion to your copy. If not, change the canvas or crop the photo so they are both in proportion. In this case the copy ( photograph ) is in proportion with my canvas.
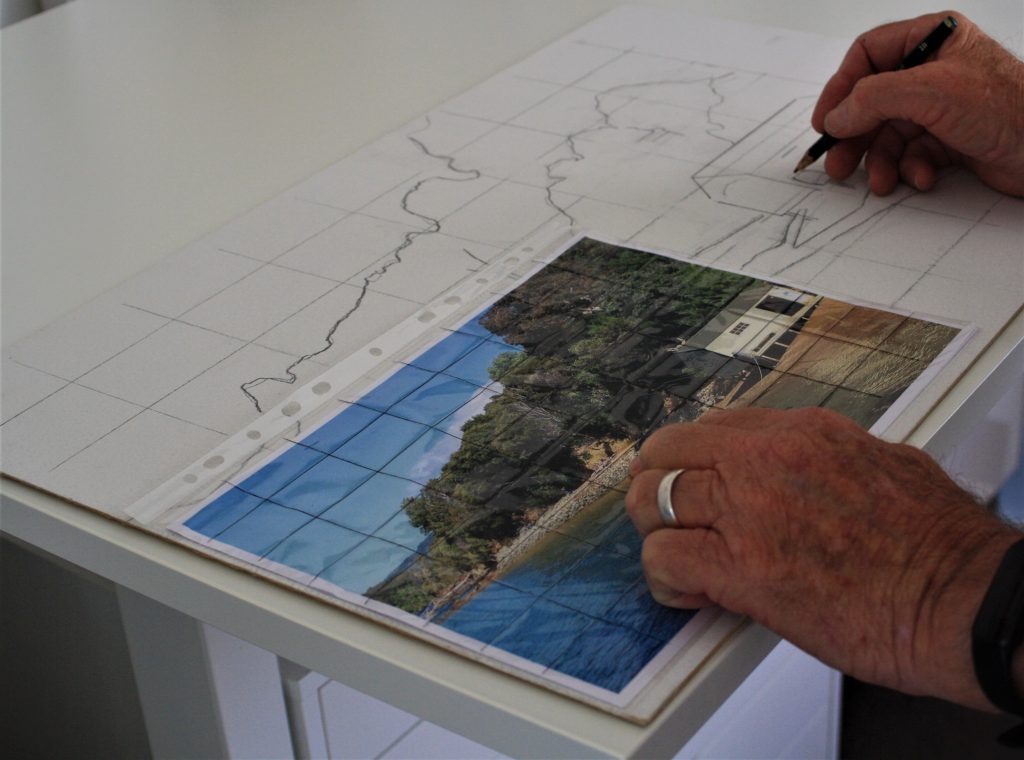
The process is the same regardless of the size of your copy whether you are working from an A4 photocopy or a photograph or whatever size the canvas is. I pop the A4 photocopy into a clear sleeve then draw the grid onto the sleeve with a ballpoint pen to save the copy from damage.
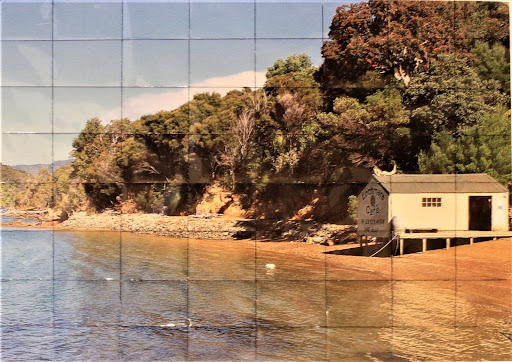
An A4 colour photocopy is about the right size to work from. It is big enough to refer to when copying. We don’t need to see every little detail, if we do we tend to fall into the trap of being too precise.
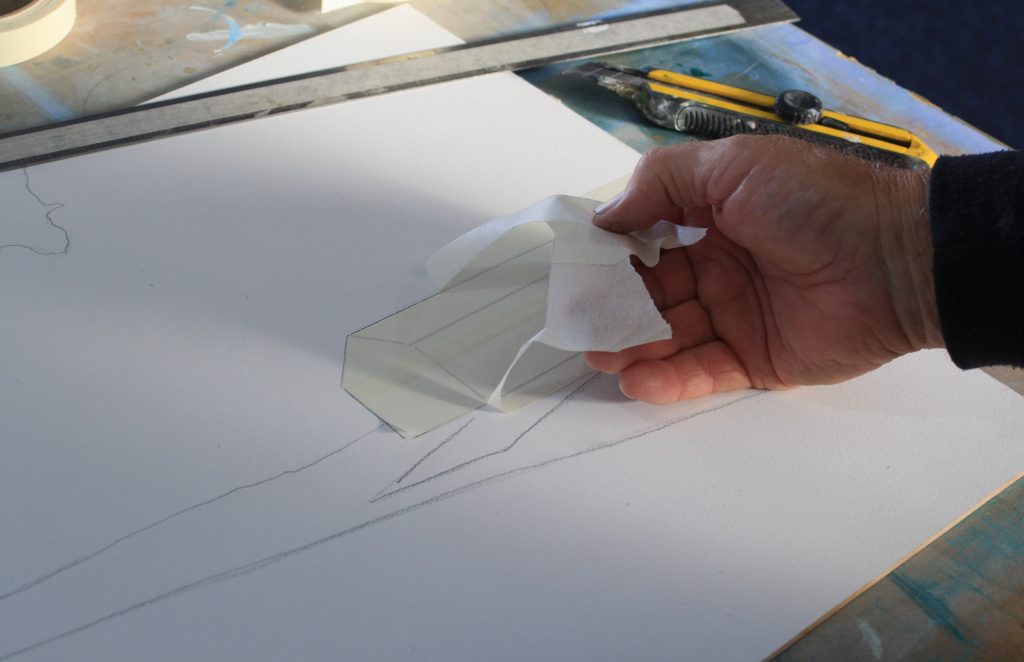
If there are just a few lines to the painting a very basic grid as above is OK. As above. If the copy is very busy then make the grid finer (more rectangles). Make sure the lines are ruled on the canvas very softly so they are easy to erase when we have finished with them.
Transposing the image from the copy to the board. 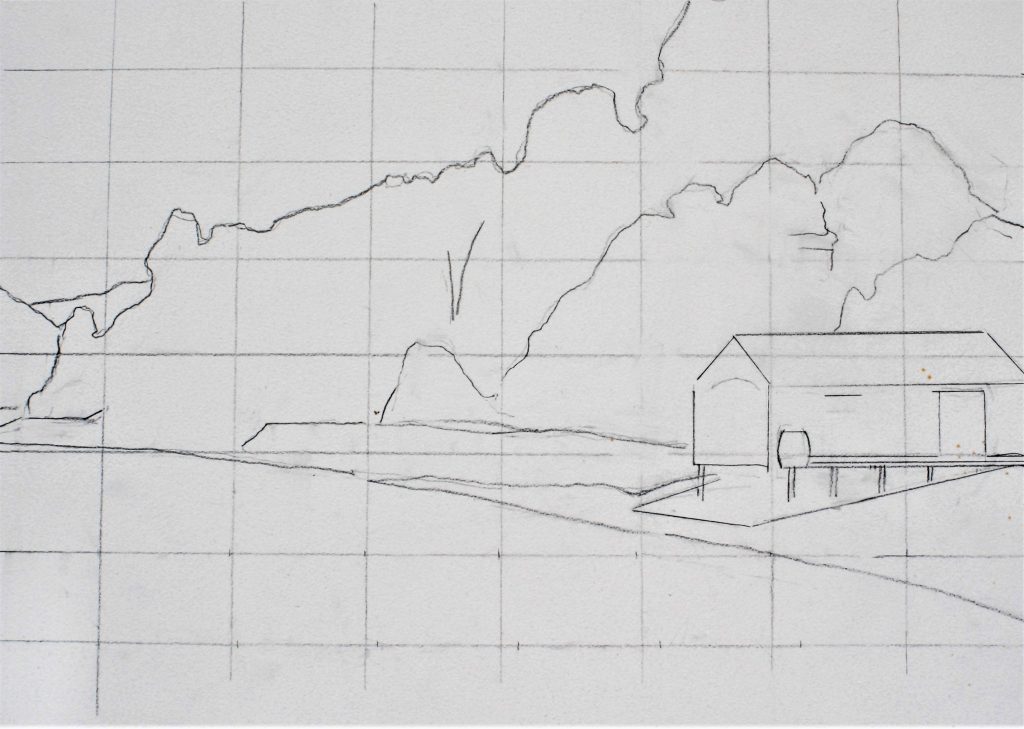
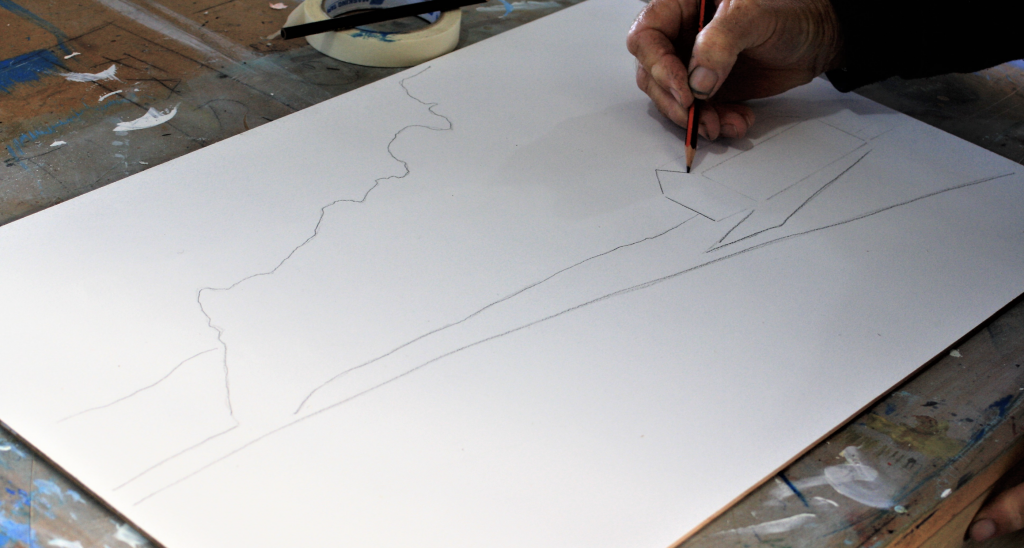
I draw the image from the copy grid onto your canvas grid, focusing on one square at a time until the entire image has been transferred.
Initially it is a bit of a pain finding the corresponding rectangles. It gets easier as you go along. This is because once a few lines are on the board and shapes appear it gets easier to see where the next lines go. Now every shape or line within each rectangle on your copy is drawn into the corresponding square on the board.
Take your time. We need to be accurate at this stage.
Once we have established the large shapes it’s a kind of relief. We are past the hard part. The layout is complete. Fitting the smaller shapes within them is easier because our boundaries are set. They are not called boundaries for laughs. All we have to do now is paint within the lines.
It is time to consider what to put in or leave out. First deconstruct the scene, analyze the interdependent relationships of the main elements. Remove anything that does not relate to the theme or support the story.
Process
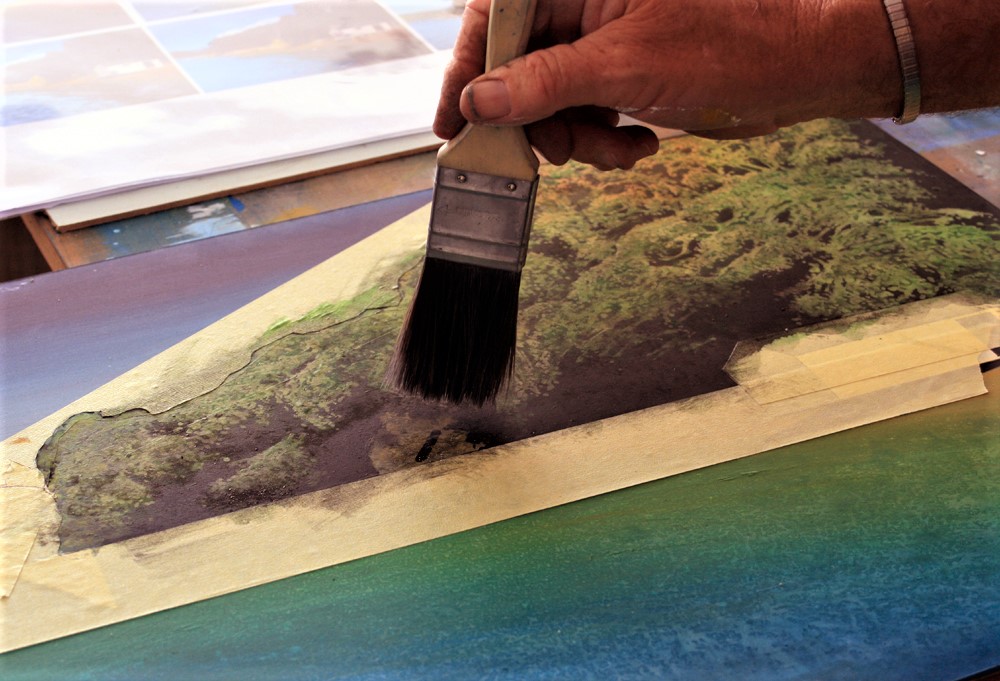
I have masked off the boat shed because I don’t want to lose it when the paint is thrown on. 
Next I mask out the hillside so I can paint the sky and the sea. That way they can be drying while I press on with the hillside, once the masking has been removed.
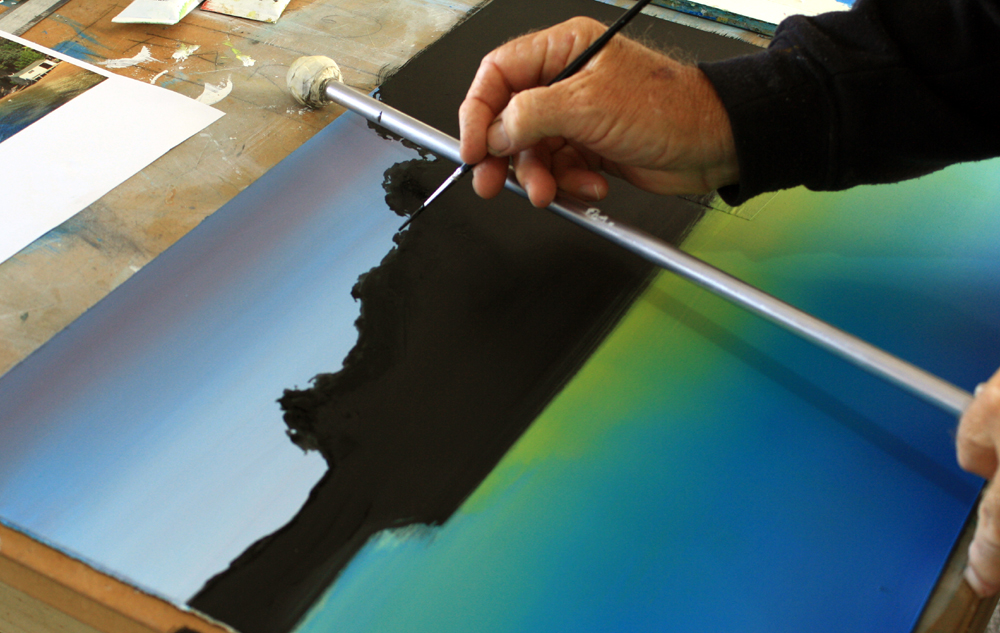
Up till now we have worked wet on wet to get all the background shapes painted in. So have a break for a day or so and let everything dry thoroughly.
Painting or drawing ‘Shape within Shape’ means blocking in the larger ones first, we have done that. In this case the sea, sky, beach and the hillside are our larger shapes. Our next step then is to work within them.
Setting Out The Brush
To me the bush seems to flow down towards the sea, they look like clouds and so I copy their progress with some chalk on my finger making the cloud shapes with a circular motion.
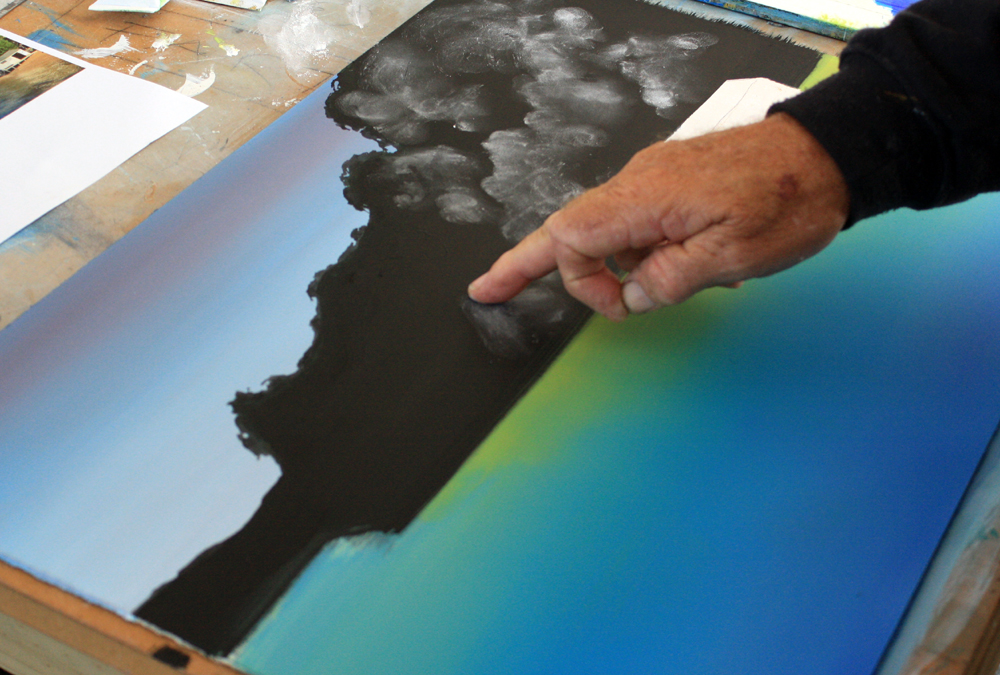
Out with a small brush and some light green for the bush and trees. I follow the chalk along treetops linking most of them as they flow down. The underside is created by rolling the brush over and over keeping the tip on the canvas but pressing the brush up and down as I follow the chalk for a loose more natural effect.
The dark background now serves its purpose of the illusion of shadows. Along with lots of other techniques I will show this on video as soon as I can.
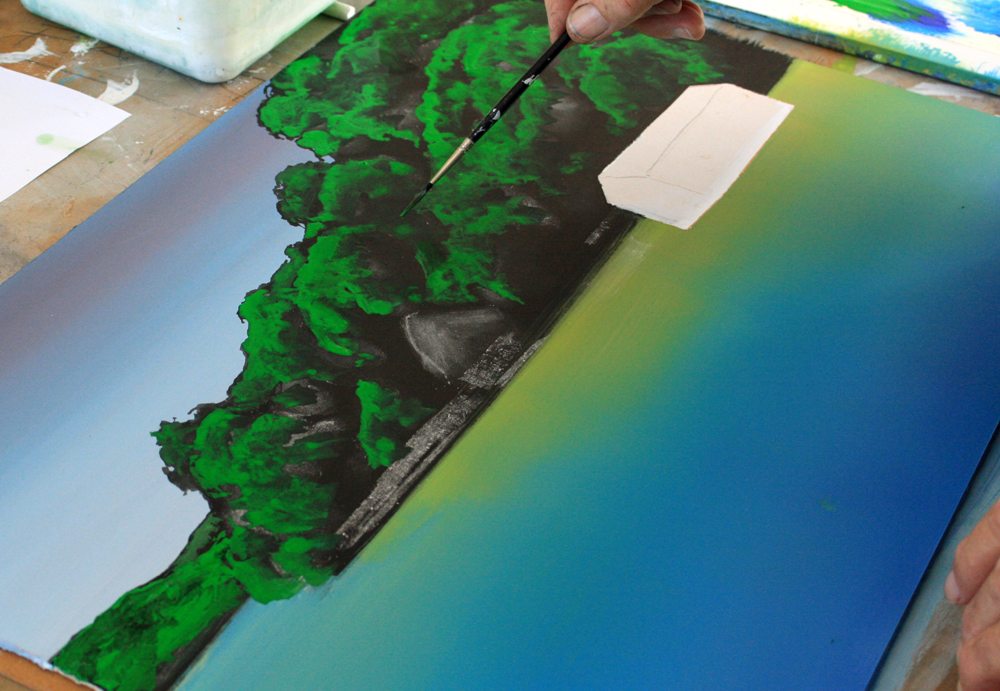
Over the sea I washed white translucent colour for the effect of light and reflection, allowed it to dry then repeated the process over the sand. Exactly the same way as our first painting. Also I start to tidy up along the shoreline including defining neatly the boatshed. I use a fine liner brush for all this detailing. Our first man made elements in such a lovely natural setting.
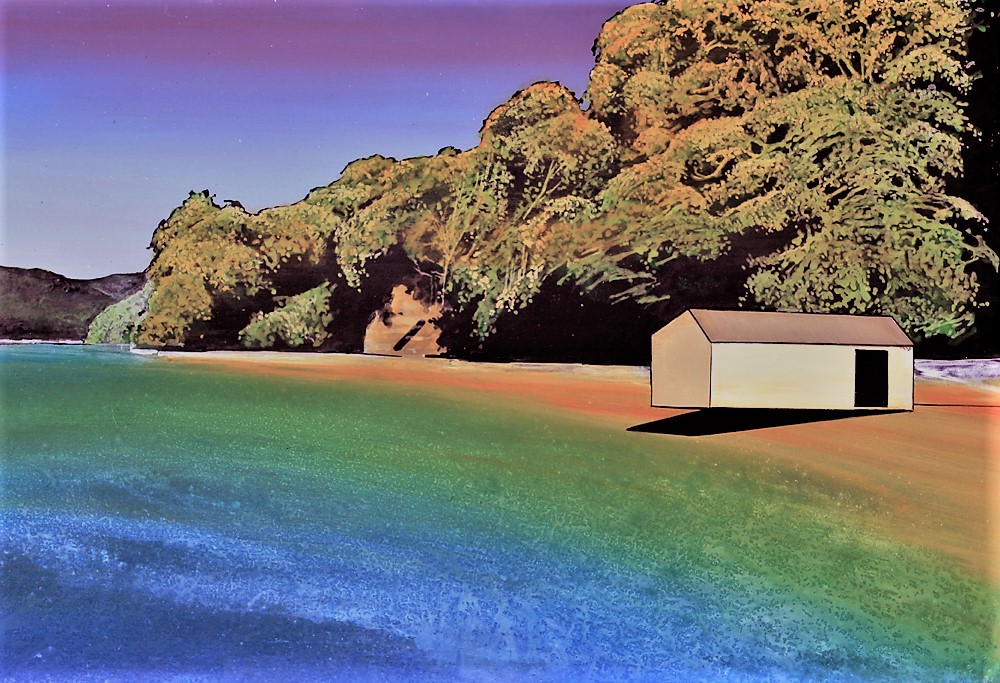
I have gone over the bush with light green highlights to soften the transition of the green colours, then white along the tops of the trees to create the effect of sunlight.
Before you do, the background bush has to be totally dry.
This is a good trick: the shading of the entire bush gives it shape and looks very real. As I blended the colour to the tree tops I changed to an orange then red to give the effect of pohutukawa flowers.
Compared to the first painting quite a few new elements have been introduced. A man made structure, a different way to paint the sea other than just a blend, our first bush with its layers, colours and tones. I have also repeated techniques that carried over from the first painting.
The techniques I use are just one way of painting with Acrylics and are based on the way I painted as a pictorial signwriter. For example the sea in this painting was just a wash. For another session I painted the water a different way as shown below. Eventually you will develop your own Techniques and approach to art theory.
There are rules laid down by the masters and aesthetics that come into play of course. Keep them in mind, but this is your creation. When you paint, have the courage to do your own thing, don’t worry about your work being accepted or rejected by others and you will enjoy painting so much more. If you choose to follow a chosen style or artist that’s fine. Most of us do. In time we inject more of ourselves into our work until it becomes truly yours not theirs.
A Little More About Scaling
It really doesn’t matter how fine we make the grid as long as the painting and copy are the same shape proportionally. I drew my grid in rectangles because it’s the easiest way to understand the process and how to draw, working from large to small shapes. In time you will fly through the drawing up stage. You may think you don’t know how to draw. Once you have scaled up your first painting you do know how to draw. You just have to work at it a little and your confidence will grow.
Some artists need to divide their copy only into four to set out their painting. Often experienced artists draw without sectioning off the copy at all. They are quick, seemingly drawing without much reference to anything, allowing for spacing and balance automatically and we are impressed. However the first marks they always make on their canvas are the boundaries. They have to start with them and won’t go outside those lines. They can do what they like within them.
Be patient with the scaling process, it is slow going at first for everyone. Over time you will gain speed, accuracy and confidence with less reliance on the small grid sizes. We are using a smaller grid to scale up from our copy onto the substrate at the moment because the smaller the squares, the more accurate the drawing. You will choose a larger grid size as you gain experience.
Click Here to Start Session 3
These artist’s notes are copyright to Graham Baker and may not be shared or copied without permission. Any enquiries, please email to grahambaker@gmail.com.